You’ve watched a few 3D Printing Nerd videos. You’ve seen the stuff people post on r/3Dprinting and thought “I could make that.” Maybe you need custom brackets for a project, want to print miniatures for tabletop gaming, or just think it would be cool to turn a CAD file into a physical object on your desk. Whatever the reason, you’re looking at buying your first 3D printer and the options are overwhelming.
Good news: 2026 is the best time in history to get into 3D printing. Printers that cost $1,000 five years ago have been outperformed by machines under $300. The slicer software is smarter. The filament is cheaper. And the community support is massive, which means almost every problem you’ll hit has already been solved by someone on Reddit or YouTube.
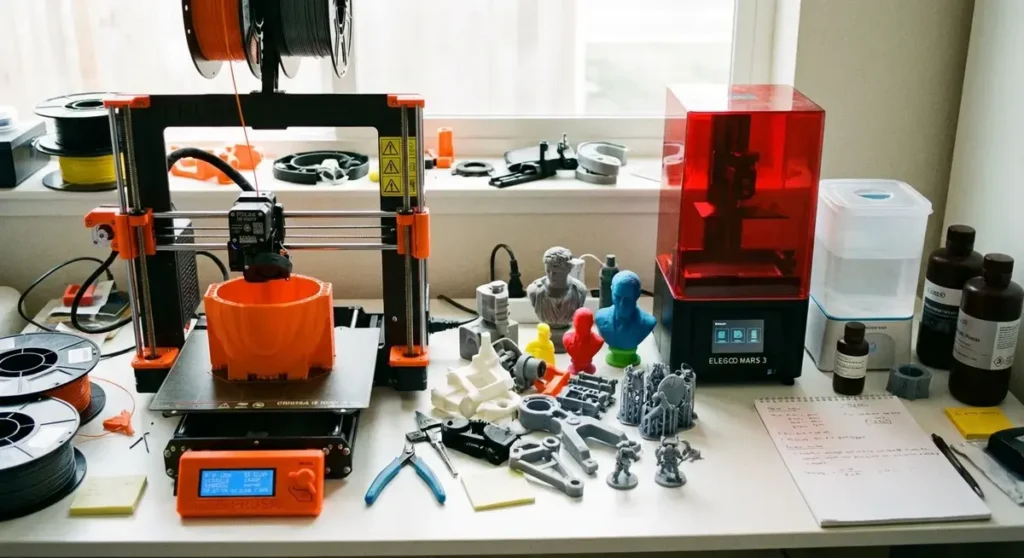
I’m going to split this guide into two categories: FDM (the ones that melt plastic filament) and resin (the ones that cure liquid resin with UV light). These are fundamentally different technologies with different strengths, and your first printer should match what you actually want to make.

Quick Picks
| Category | Pick | Price | Technology | Why |
|---|---|---|---|---|
| Best FDM Overall | Bambu Lab A1 Mini | ~$200 | FDM | Fast, reliable, minimal calibration |
| Best Budget FDM | Creality Ender-3 V3 SE | ~$180 | FDM | Proven design, huge community |
| Best FDM Under $400 | Bambu Lab A1 | ~$340 | FDM | Multi-color capable, great first “real” printer |
| Best Resin Overall | Elegoo Saturn 4 Ultra | ~$350 | MSLA Resin | Large build volume, fast, sharp details |
| Best Budget Resin | Elegoo Mars 5 | ~$170 | MSLA Resin | Perfect entry point for miniatures |
| Best All-Rounder | Bambu Lab P1S | ~$500 | FDM | Enclosed, multi-material, prosumer quality |
FDM vs Resin: Which Should You Start With?
This is the first decision you need to make, and it depends entirely on what you want to print.
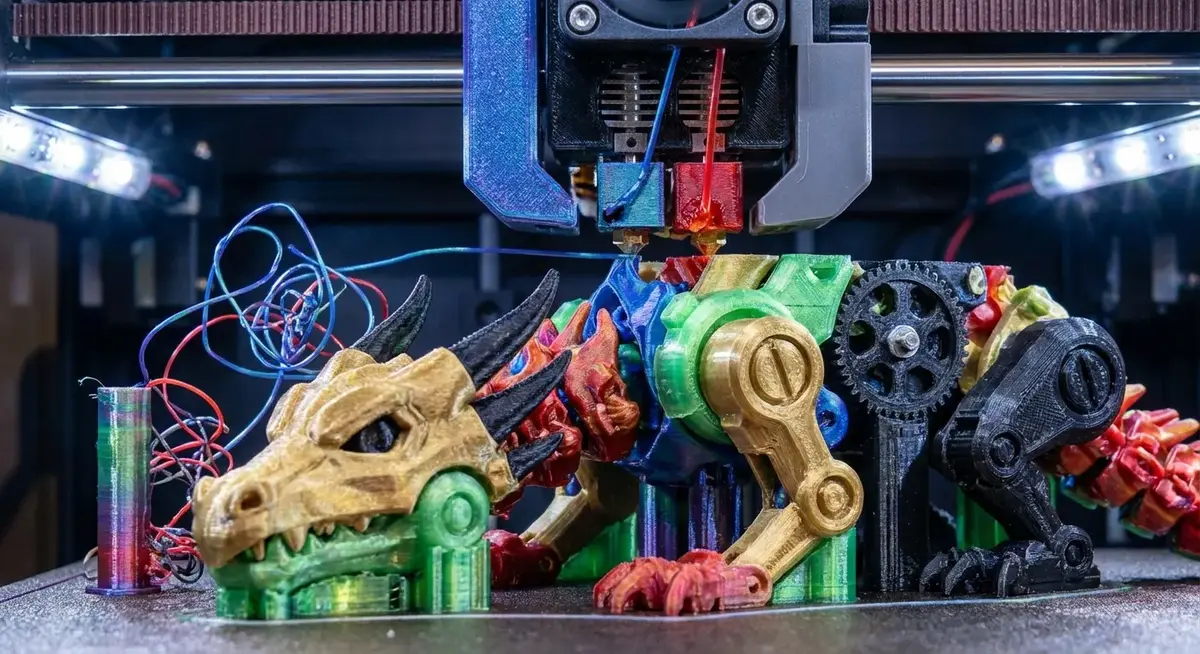
FDM (Fused Deposition Modeling) works by melting thermoplastic filament and depositing it layer by layer. Think of a very precise hot glue gun controlled by robots. FDM printers are better for functional parts, prototypes, enclosures, brackets, cosplay armor, and anything larger than a few inches. The surface finish shows visible layer lines (which you can sand or post-process), and fine details under about 0.4mm get mushy.
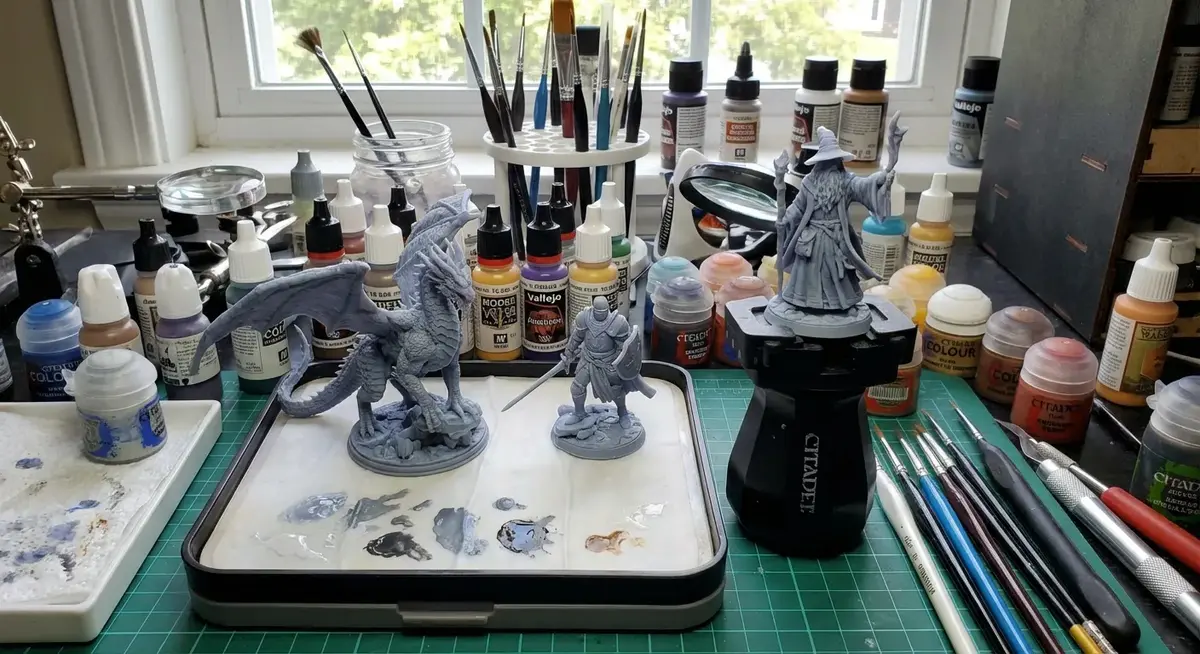
Resin (MSLA/SLA) works by exposing liquid photopolymer resin to UV light, curing it one layer at a time. Resin produces much finer details than FDM. Surface finishes are smooth enough to look injection-molded. Resin is the right choice for miniatures, jewelry, dental models, and anything where fine detail matters more than size or structural strength.
The practical differences:
| Factor | FDM | Resin |
|---|---|---|
| Detail quality | Good (0.1-0.3mm layers visible) | Excellent (nearly invisible layers) |
| Print speed | Fast (modern printers: 300-500mm/s) | Moderate (cures entire layer at once) |
| Build volume | Large (up to 256x256x256mm budget) | Small to medium (most under 200mm tall) |
| Material cost | Low ($15-25/kg filament) | Medium ($25-40/kg resin) |
| Post-processing | Minimal (remove supports, optional sanding) | Required (wash, cure, handle chemicals) |
| Smell/ventilation | Mild (PLA is nearly odorless) | Strong (resin fumes require ventilation) |
| Mess factor | Low (dry plastic) | High (liquid resin is sticky and toxic) |
| Strength | Good to excellent | Moderate (brittle without tough resin) |
| Safety | Generally safe | Requires gloves, ventilation, eye protection |
My recommendation for absolute beginners: Start with FDM unless you specifically need resin-level detail (miniatures, jewelry). FDM is more forgiving, less messy, has a lower failure cost (a failed FDM print wastes $0.50 of filament, a failed resin print wastes $3-5 of resin plus cleaning), and the learning curve is gentler.
Best FDM Printers for Beginners
Bambu Lab A1 Mini — Best Overall First Printer
Bambu Lab shook up the industry when they launched the X1 Carbon in 2022, proving that 3D printers could be fast, reliable, and easy to use out of the box. The A1 Mini brings that philosophy down to a beginner-friendly price point, and it’s the printer I recommend most to people buying their first machine.
Specs:
– Build volume: 180 x 180 x 180mm
– Max speed: 500mm/s
– Auto bed leveling (eddy current sensor)
– Direct drive extruder (all-metal hotend)
– Max nozzle temp: 300C (handles PLA, PETG, TPU, ABS)
– Textured PEI build plate
– WiFi + LAN connectivity
– Built-in camera
– Bambu Studio + OrcaSlicer compatible
– Optional AMS Lite for multi-color (4 filaments)
Price: Bambu Lab A1 Mini — around $200
Combo with AMS Lite: A1 Mini + AMS Lite — around $340
Here’s what makes the A1 Mini special for beginners: you take it out of the box, run the automatic calibration (about 15 minutes), load filament, and start printing. There’s no bed leveling to learn, no Z-offset to calibrate by hand, no belt tensioning to worry about. The first print just works.
Maker’s Muse reviewed the A1 Mini extensively and called it the easiest onboarding experience he’s tested. Joel from 3D Printing Nerd has featured it in several videos and consistently recommends it as the “if you can only buy one” printer for newcomers.
The 180mm cube build volume is small compared to full-size printers, but it’s enough for the vast majority of beginner projects. Phone stands, cable organizers, small enclosures, figurines, replacement parts. If you need to print something larger than 180mm, you’ll know by then what you want in your next printer.
The AMS Lite option adds automatic multi-color printing for about $140 more. It’s not essential, but printing in 4 colors without manual filament swaps is genuinely fun and opens up projects (lithophanes, multi-color logos, functional parts with different materials) that single-color can’t touch.
Creality Ender-3 V3 SE — Best Budget FDM
The Ender-3 series is the Honda Civic of 3D printing. There are millions of them in the wild, which means the community knowledge base is unmatched. Whatever problem you have, someone has solved it and posted about it. The V3 SE is the current budget model, and Creality has finally added features that used to require modifications.
Specs:
– Build volume: 220 x 220 x 250mm
– Max speed: 250mm/s (with input shaping)
– CR Touch auto bed leveling (included, not a mod)
– Direct drive extruder (Sprite extruder)
– Max nozzle temp: 260C
– PEI spring steel build plate
– No WiFi (USB/SD card only)
– Creality Print slicer or Cura compatible
Price: Creality Ender-3 V3 SE — around $170-190
The V3 SE finally includes auto bed leveling, a direct drive extruder, and a PEI build plate as standard features. Older Ender-3 models required you to buy and install these upgrades yourself ($50-100 in parts plus time), so the V3 SE at ~$180 with everything included is the best value this line has ever offered.
Print speed tops out at 250mm/s, which is noticeably slower than the Bambu at 500mm/s. You’ll feel this on larger prints. A part that takes 2 hours on the Bambu takes 3-4 hours on the Ender. For beginners, this rarely matters because you’re printing overnight or while you’re at work anyway. But if print speed is important to you, the Bambu wins.
The lack of WiFi means you’re loading print files via SD card or USB cable. Not a dealbreaker, but less convenient than the Bambu’s wireless workflow where you slice on your computer and send the job directly to the printer.
Why the community still matters: The sheer volume of Ender-3 content on YouTube, Reddit, and Thingiverse means you will never be stuck on a problem. r/ender3 has over 250,000 members. There’s a video tutorial for every conceivable issue, upgrade, and mod. That support network has genuine value for a beginner.
Bambu Lab A1 — Best FDM Under $400
The A1 is the full-size version of the A1 Mini. Same ease-of-use philosophy, bigger build volume, and the AMS Lite multi-color system was designed specifically for this printer.
Specs:
– Build volume: 256 x 256 x 256mm
– Max speed: 500mm/s
– Auto bed leveling + vibration compensation
– Direct drive extruder (all-metal hotend)
– Max nozzle temp: 300C
– Textured PEI build plate (dual-sided)
– WiFi + LAN, built-in camera
– AMS Lite support (up to 4 filaments)
– Open bed design (no enclosure)
Price: Bambu Lab A1 — around $330-350
Combo with AMS Lite: A1 + AMS Lite — around $470
The 256mm build volume is the standard size for desktop FDM printers and handles almost everything a hobbyist would want to print. Helmets, large cosplay pieces, and full-size functional prototypes all fit.
The dual-sided build plate is a nice touch: textured PEI on one side for most prints, smooth PEI on the other for a glossy bottom surface when you want it.
If I were buying my first printer today and had $350 to spend, this is the one I’d get. The A1 Mini is great, but the extra $130-150 for a 42% larger build volume and overall more capable machine is worth it if your budget allows.
Bambu Lab P1S — Best Under $500
The P1S sits at the top of the beginner budget range, and it’s the cheapest enclosed CoreXY printer from Bambu. The enclosure matters if you want to print ABS, ASA, or nylon without warping (these materials need consistent temperature and don’t do well in open air).
Specs:
– Build volume: 256 x 256 x 256mm
– Max speed: 500mm/s
– Fully enclosed with removable top
– CoreXY motion system
– Direct drive (all-metal hotend, hardened steel nozzle)
– Active carbon air filtration
– Max nozzle temp: 300C (prints everything)
– WiFi + LAN, built-in camera, LED lighting
– AMS support (up to 16 filaments with 4 AMS units)
– OrcaSlicer compatible
Price: Bambu Lab P1S — around $480-520
The P1S is for people who already know they’re going all in. The enclosure, active filtration, and hardened steel nozzle mean it handles any filament type without modifications. PLA, PETG, TPU, ABS, ASA, carbon fiber filled, glass fiber filled. All of it.
Maker’s Muse called the P1S “the printer that makes every sub-$1000 competitor irrelevant” in his 2025 roundup, and that assessment holds in 2026. It’s fast, reliable, and capable enough that many users never feel the need to upgrade.
Who it’s for: Beginners who already know they’re going to go deep into this hobby, or intermediate users stepping up from a budget machine. If you buy an A1 Mini and love printing, the P1S will probably be your next purchase. Buying it first just skips a step.
Best Resin Printers for Beginners
Elegoo Mars 5 — Best Budget Resin
Elegoo owns the budget resin market the way Creality owns budget FDM. The Mars series has been the go-to beginner resin printer for years, and the Mars 5 keeps that going with an updated light source and better build plate adhesion.
Specs:
– Build volume: 143 x 89.6 x 175mm
– 8K resolution (7680 x 4320, 18um XY resolution)
– COB light source (uniform curing)
– 9.1” monochrome LCD
– ACF film release system
– USB connectivity
– Chitubox/Lychee slicer compatible
Price: Elegoo Mars 5 — around $160-190
Essential accessories:
– Elegoo Wash and Cure Station — around $90-120
– Elegoo Standard Resin (1kg) — around $25
– Nitrile gloves (non-negotiable for resin handling)
– 99% isopropyl alcohol for washing
At 18 micron XY resolution, the Mars 5 resolves details that FDM printers can’t physically reproduce. Tabletop miniature faces have recognizable expressions. Jewelry prototypes show clean details. Small mechanical parts have tight tolerances.
The build volume is small (about the size of a smartphone screen), which is fine for miniatures and small parts but limiting if you want to print anything larger than a 6-inch figurine. Resin printers use a fixed LCD to cure entire layers at once, so the build plate area is the bottleneck, not the height.
The resin printing reality check: Resin printing requires a wash-and-cure workflow. After the print finishes, you wash it in isopropyl alcohol (or water-washable resin alternative) to remove uncured resin, then cure it under UV light to harden fully. This takes 10-20 minutes and requires handling chemicals. Uncured resin is a skin sensitizer. Wear gloves. Always. The Elegoo Wash and Cure Station automates this process and is basically required equipment.
You also need ventilation. Resin fumes aren’t catastrophically toxic, but they smell bad and can cause headaches with prolonged exposure. A garage, well-ventilated room, or enclosure with an activated carbon filter is the standard approach. Don’t run a resin printer in a closed bedroom.
Elegoo Saturn 4 Ultra — Best Resin Printer Under $400
The Saturn line is Elegoo’s mid-range. Bigger build volume, faster print speeds, and higher resolution than the Mars. The Saturn 4 Ultra is the current flagship of the lineup and it’s packed with features that were $1,000+ territory two years ago.
Specs:
– Build volume: 218.88 x 122.88 x 220mm
– 12K resolution (11,520 x 6,480, 19um XY)
– Fresnel collimating light source
– 10” monochrome LCD
– WiFi connectivity with Elegoo app
– Tilt release mechanism (faster peeling)
– Built-in air filtration
– USB + WiFi
– Chitubox/Lychee slicer compatible
Price: Elegoo Saturn 4 Ultra — around $330-370
The Saturn 4 Ultra’s build volume is roughly double the Mars 5. You can print full-size helmets (in sections), large figurines, and batch multiple miniatures in a single print. The 12K resolution maintains detail quality across that larger area.
The built-in air filtration is a welcome addition. It doesn’t eliminate the need for room ventilation entirely, but it significantly reduces ambient resin odor. Running the printer in a room with a cracked window becomes viable rather than needing a dedicated garage setup.
The tilt release mechanism reduces peel forces compared to straight-pull designs, which means fewer failed prints from parts detaching from the build plate mid-print. It also reduces layer lines on the final print because each layer separates more cleanly.
YouTube reviewers including Uncle Jessy and 3DPrintFarm have called the Saturn 4 Ultra the best value resin printer in this size class. It’s overkill if you’re printing a few miniatures a month, but perfect if you plan to print regularly.
Who it’s for: Miniature painters who batch-print armies, cosplayers making detailed prop pieces, makers who need high-detail parts with reasonable size, or anyone who’s already tried a smaller resin printer and wants more capacity.
Essential Accessories and Supplies
For FDM Printers
Filament to start with:
– Bambu Lab PLA Basic (1kg) — around $16 (excellent quality, consistent diameter)
– Hatchbox PLA (1kg) — around $22 (community favorite, wide color range)
– Overture PETG (1kg) — around $18 (stronger than PLA, good for functional parts)
Start with PLA. It’s the easiest material to print, doesn’t need an enclosure, barely smells, and handles most beginner projects perfectly. Move to PETG when you need heat resistance or strength (outdoor items, parts near heat sources). ABS and beyond can wait until you have a few dozen prints under your belt.
Tools:
– Flush cutters for removing supports (any brand, ~$8)
– Scraper/putty knife for stubborn prints
– Needle files for smoothing support nub marks
– Digital calipers for checking dimensions ($15-20 on Amazon)
– A dedicated filament dry box or Sunlu FilaDryer S2 (~$50) for keeping filament moisture-free
Moisture is PLA’s enemy. Filament absorbs humidity from the air and produces popping, stringing, and poor surface quality. A sealed container with silica gel packs works for storage. The Sunlu dryer actively heats filament to drive moisture out and lets you print directly from the dryer.
For Resin Printers
Resin to start with:
– Elegoo Standard Resin — $22-28/kg (good detail, easy to use)
– Siraya Tech Fast — $35-40/kg (lower odor, faster curing, better detail)
Required safety equipment:
– Nitrile gloves (not latex, resin eats through latex)
– Safety glasses
– Respirator with organic vapor cartridges if no ventilation
Post-processing:
– Elegoo Mercury Plus 2.0 Wash and Cure — around $100 (washes and cures in one unit)
– 99% isopropyl alcohol (grocery/pharmacy, get a gallon)
– Paper towels (so many paper towels)
– Silicone mat to contain spills
Learning Resources That Actually Help
YouTube Channels
Maker’s Muse (Angus Deveson): Australian maker who does thorough, honest reviews and practical printing tutorials. His “3D Printing Failures” series is genuinely educational for beginners because it shows what goes wrong and how to fix it. Not sponsored by printer companies, which keeps his reviews trustworthy.
3D Printing Nerd (Joel Telling): Joel’s energy is contagious and his videos are beginner-friendly without dumbing things down. His “First 10 things to 3D print” videos are a great starting point for project ideas after unboxing a new printer.
Teaching Tech: Michael covers calibration and troubleshooting better than anyone else on YouTube. His calibration website walks you through every setting step by step with test prints for each adjustment.
Uncle Jessy: Focuses on the creative application side. Great for cosplay, props, and practical printing projects. His resin printing guides are particularly well-done.
Communities
r/3Dprinting (2M+ members): The main subreddit. Good for troubleshooting, showing off prints, and getting advice. Read the wiki before posting.
r/BambuLab, r/ender3, r/ElegooMars: Brand-specific subreddits with focused knowledge bases.
Printables.com: MakerWorld competitor (by Prusa) for downloading ready-to-print models. Better curation than Thingiverse.
MakerWorld.com: Bambu Lab’s model-sharing platform. Growing fast, with free models and community ratings. Models include pre-configured print profiles for Bambu printers.
Where to Find Things to Print
You don’t need to learn CAD to start 3D printing. There are millions of free models available:
- Printables.com — Curated, well-organized, growing fast
- MakerWorld.com — Bambu’s platform, excellent Bambu printer integration
- Thingiverse.com — The original. Massive library, but search and organization are rough
- MyMiniFactory.com — Focused on miniatures and artistic models, mix of free and paid
When you’re ready to design your own models:
– TinkerCAD (free, browser-based) — perfect for beginners, drag-and-drop 3D modeling
– Fusion 360 (free for personal use) — industry-standard parametric CAD, steeper learning curve but incredibly powerful
– Blender (free) — organic modeling, sculpting, artistic designs
My Recommendation: Where to Start
Just want to try 3D printing ($170-200): Creality Ender-3 V3 SE + a spool of Hatchbox PLA. Cheap enough that you won’t regret it if printing isn’t your thing, capable enough to produce genuinely useful results if it is.
Ready to commit ($200-350): Bambu Lab A1 Mini (or A1 if you can stretch to $340). The Bambu experience is so much smoother than budget printers that it reduces the chance you’ll get frustrated and quit during the learning curve. The A1 Mini + AMS Lite combo at $340 opens up multi-color printing, which is where the real fun starts.
Want miniatures/detailed models ($200-300): Elegoo Mars 5 + Wash and Cure Station + resin + safety gear. Budget about $300 total for the complete resin setup. Accept the messier workflow in exchange for detail quality that FDM can’t touch.
Going all in ($450-550): Bambu Lab P1S. Enclosed, capable of every filament type, fast, reliable, and it’ll still be your workhorse 3 years from now. This is the printer that people upgrade TO, so starting here saves you the “buy cheap, buy twice” cycle.
Your first prints will be imperfect. Your benchy will have stringing. Your first resin miniature will have support scars. That’s normal and that’s how you learn. Print the calibration tests, read the troubleshooting guides, and ask questions on Reddit. Everyone started where you are.
Prices checked March 2026. Amazon affiliate links help support the site at no extra cost to you.