
ESP8266 NodeMCU Relay WiFi Garage Door Opener with Blynk
//July 21 2016 Cleaned Up and Updated Code – Added IP Address Display and WiFi Strength to Blynk App
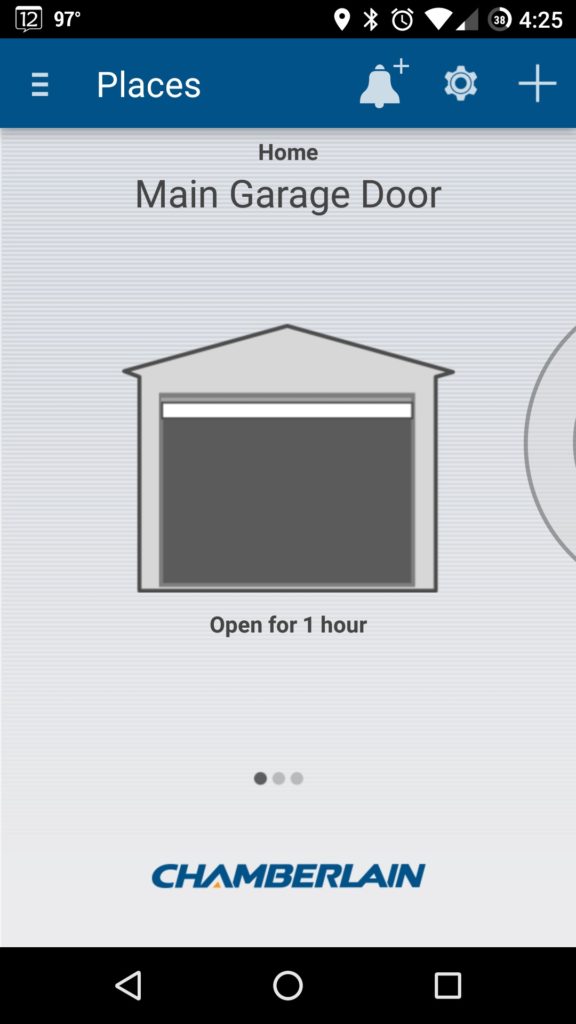
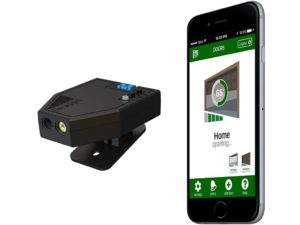
Recently, I purchased a Chamberlain MYQ Internet Gateway for my primary Garage Door. This only took about 20 minutes to get setup and now I had remote control of my garage door but more importantly I could set up rules to get push notifications or emails if for certain events such as “Garage Door Has Been Opened” or “Garage Door is still open after 8pm”.
*Disclaimer: Most if not all links on this page will be Affiliate Links. This helps pay for things like website hostings and more bits & gadgets to write about.


I waited about a week to make sure it all worked the way I wanted to before I ordered a second wall remote for my other garage door.
After a few days I received it and it proper Geek Fashion, I was excited to get it installed. That is when I realized my second garage door opener is not Chamberlain or Liftmaster but Marantec! Much to my disappointment, the Marantec Garage Door Opener isn’t compatible with the MYQ Wall Button Remote. 🙁
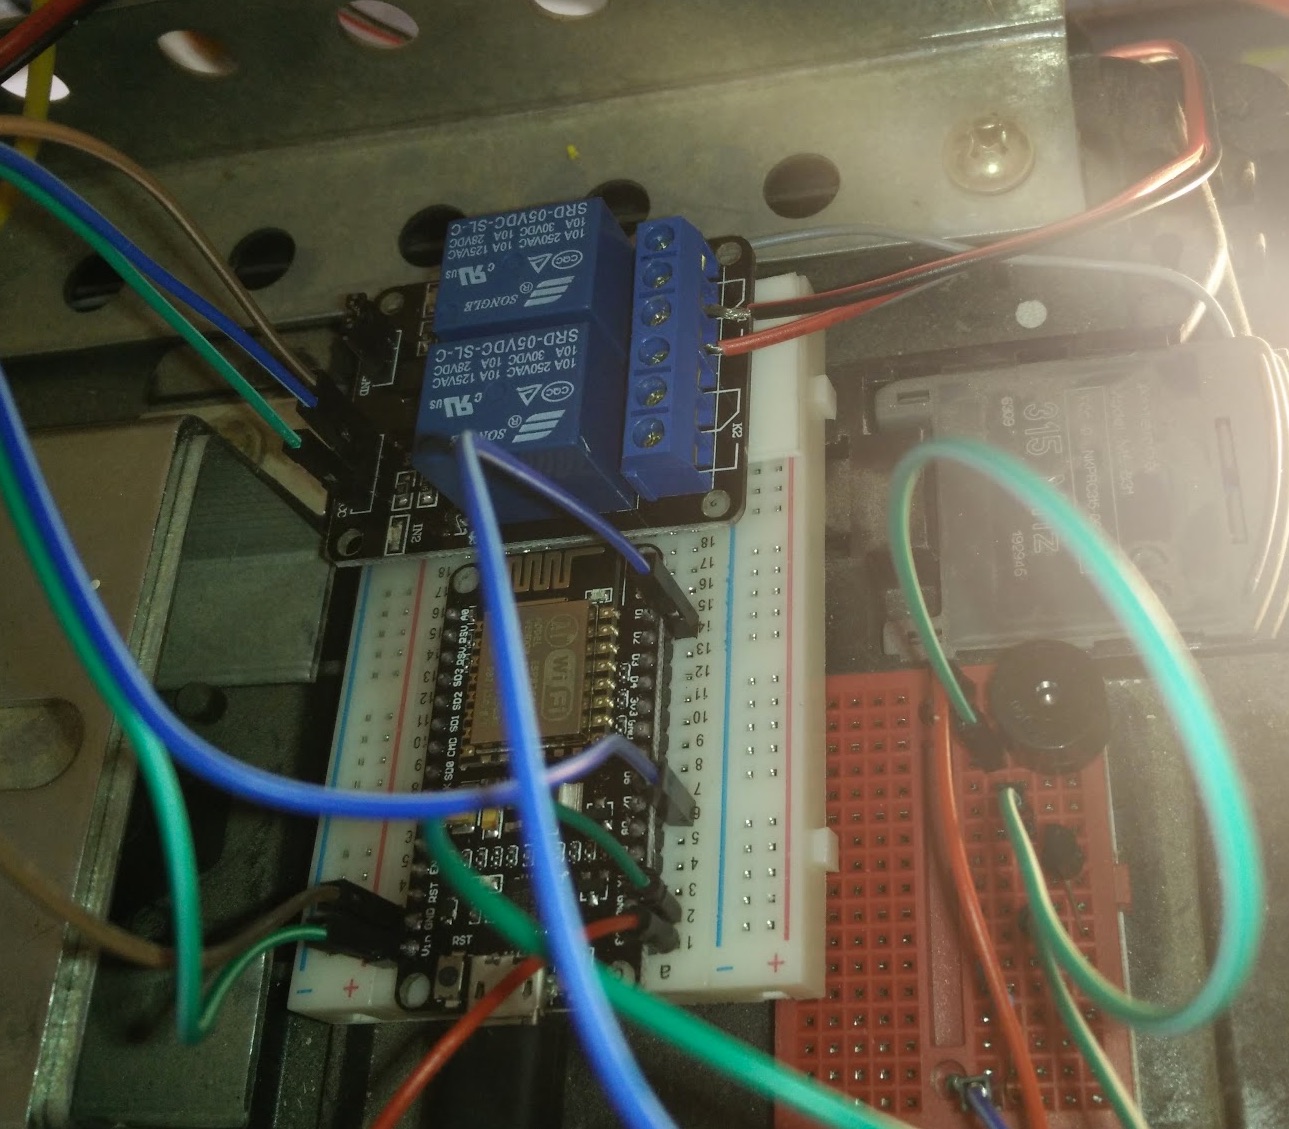
What is a Geek to do? Build one! So that’s what I did.
Parts List:
ESP8266 NodeMCU HiLetgo new Version from Amazon $8
Diymall 2 Channel 5V DC Relay Module Solid State High Level OMRON SSR AVR DSP for Arduino – didn’t work for me and I sent it back.
Uxcell a13071200ux0770 Relay Shield Module $4.99 from Amazon. Worked better than the Solid State Relay mentioned above.
Assorted Breadboards – I bought a pack on Amazon for $10.99 but you probably have a few extra laying around.
Ksmile 20M 20AWG 66ft Extension Cable Wire Cord for Led Strips Single Colour 3528 5050, 2 Pin Red/Black Hookup Wire 12V DC
(I only needed about 1 foot and you may already have suitable wire laying around.)
3M Scotch Heavy Duty Mounting Tape, 1-Inch by 125-Inch (314) holds up to 5 lbs – $4.39 on Amazon
I also used an Active Buzzer I had from this SunFounder Project Super Starter Kit for Raspberry Pi 3, 2 & Model B+ but you can purchase just the buzzer for a lot cheaper without the kit.( 10 Active buzzers for $8 on Amazon )
You can probably save some money if you order a lot of these parts from Ebay, Bangood or AliExpress, but I have Amazon Prime and hate waiting for my geek stuff to arrive 😉
Don’t want to DIY, but DO want to stick with Open Source, check out Garadget by SoftComplex which is based on the Particle Photon!
Arduino ESp8266 Setup
I am on a Mac so I needed to download this driver and rebooted after it was done installing: Silicon Labs CP210x USB to UART Bridge VCP Drivers
Go here and download/install the latest Arduino Software package: https://www.arduino.cc/en/Main/Software
You’ll need to do a few things in Arduino before it’s ready to talk to the ESP8266 NodeMCU.
First, go to Preferences and add this to Additional Boards Manager URLs: http://arduino.esp8266.com/stable/package_esp8266com_index.json
Next, go to Arduino – Sketch – Include Library – Manage Libraries.
Search for ESP8266 and install these two libraries:
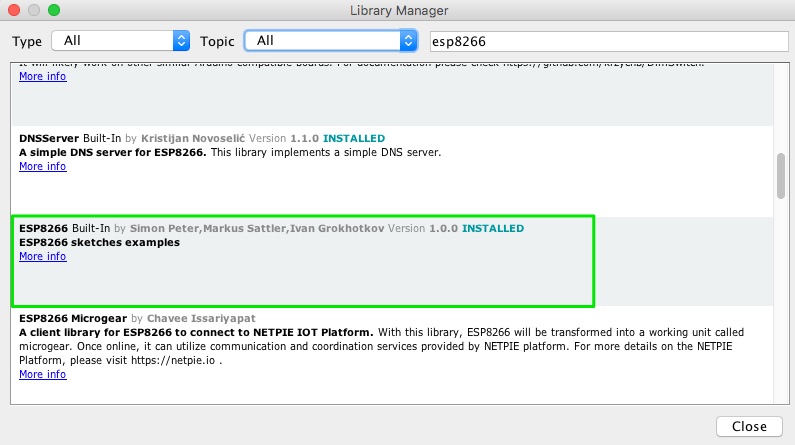
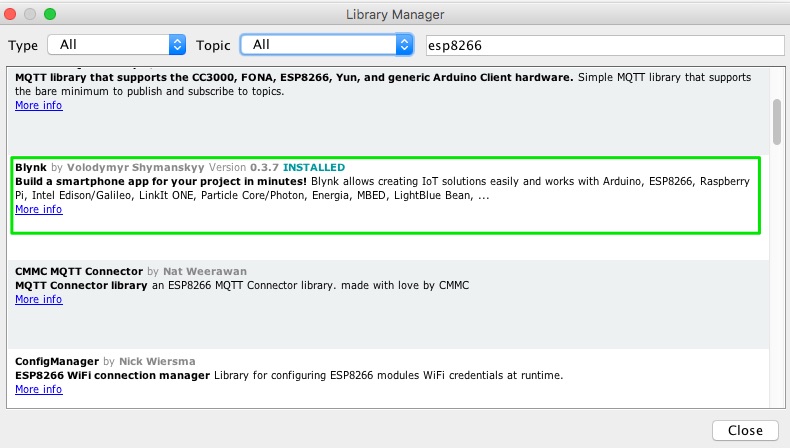
After those are installed, close the Arduino App and then reopen it.
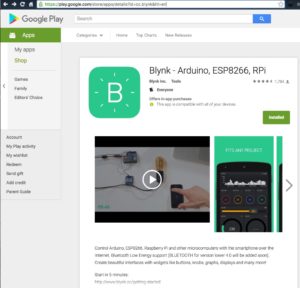
Before we connect the ESP8266 NodeMCU, Let’s get the Blynk App setup(you’ll also need to set up a Free Blynk Account)
Google Play Link:https://play.google.com/store/apps/details?id=cc.blynk&hl=en
Apple Store Link: https://itunes.apple.com/us/app/blynk-iot-for-arduino-raspberry/id808760481?mt=8
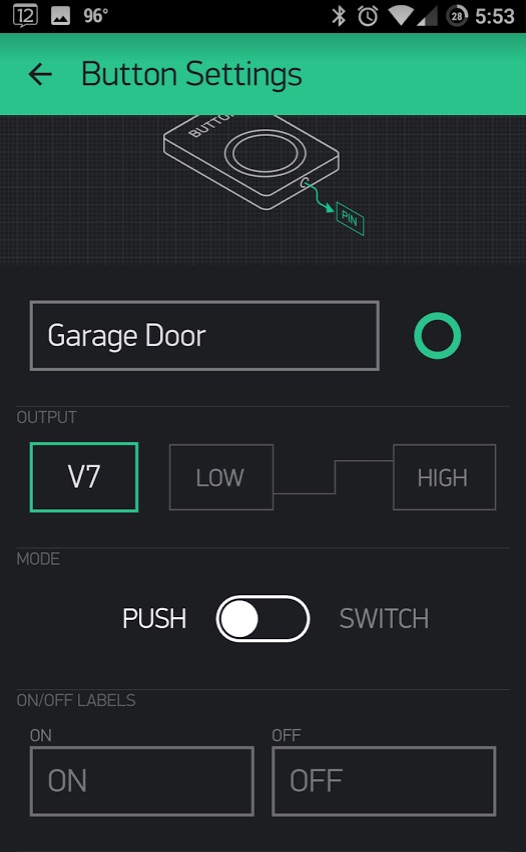
Open Blynk, setup or enter your account info, create new project and select ESP8266
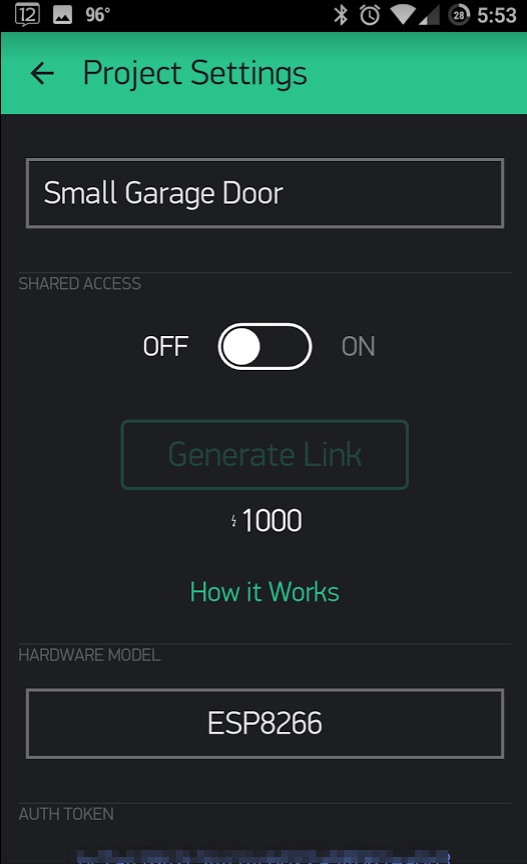
Make a note of your Authorization Code, or better yet, use the option to email it yourself. You’ll need to copy this Auth code into the Arduino Code.
Now that we have Blynk setup, connect your ESP8266 NodeMCU to a USB cable.
I found several tutorials with Garage Code but none that did everything I needed, so my Arduino code is hacked together from other people’s projects. I know it’s crappy and I will refine it!
On my particular Marantec Garage Door Opener, I noticed when I shorted the two wires (connected to the wall button) very quickly, it would turn the light on or off. If I shorted them longer, it would open/close the garage door. Knowing this I added some code to turn the light on/off a few times as a warning.
Also note, I initially tried this with a Solid State Relay but could not get it to work properly. Not sure if that relay was bad or if Solid State reacts differently.
My Chamberlain Garage Door does this light flashing and beeps, so I decided to add an active buzzer to the project.
Wiring Diagram Coming Soon!

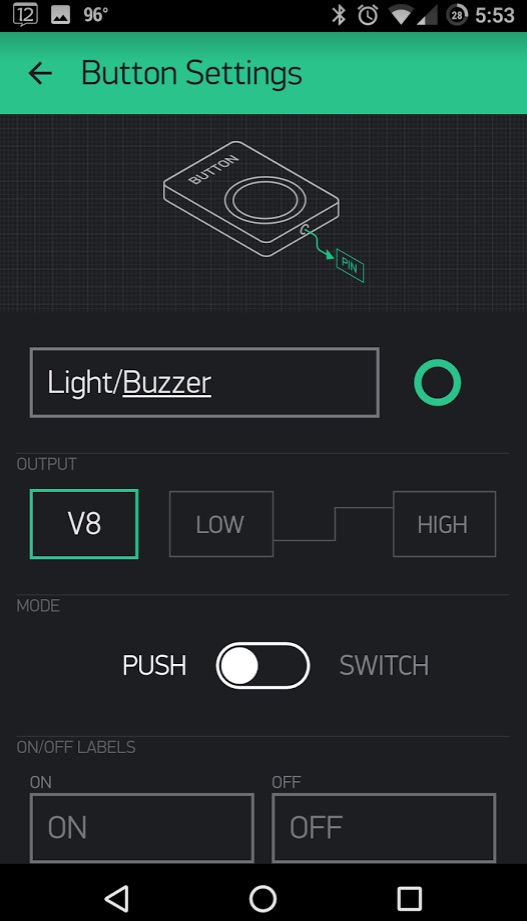
/*   ********************************************************************************************
          Garage Door Opener  with Warning Light and Buzzer for Marantec
          Author: Rich Plakas / Austin, TX - USA
          Reviewed: July 21, 2016
 *   ********************************************************************************************
*/

#include <ESP8266WiFi.h>
#include <BlynkSimpleEsp8266.h>
#include <Wire.h>
#define REST      1000    //Rest Between Inhalations.
char auth[] = "Your Blynk Auth Code Goes Here";
WidgetLCD lcd(V9);
int buzzer = 5 ;// connect the I/O pin on the buzzer to this

long rssi;
IPAddress ip;

void setup()
{
  digitalWrite(13, HIGH); //GPIO13
  pinMode(13, OUTPUT);       // Pin connected to the Relay
  digitalWrite(5, HIGH); //GPIO5
  pinMode(buzzer, OUTPUT);       // Pin connected to the Buzzer
  Serial.begin(115200);
  Blynk.begin(auth, "Your WifI Access Point Name", "Wifi AP Password");
  lcd.clear();
}

// ---------[ Widget Button using  virtual pin # 7 ]--------------------

BLYNK_WRITE(V7)
{
  if (param.asInt() == 0)
  {
   digitalWrite(13, HIGH); //GPIO13
  }
  else
  {
 //Beep Buzzer & Flash Lights
  unsigned char i, j ;// define variables
      for (i = 0; i <12; i++)
      {
      digitalWrite (buzzer, LOW) ; // Turn buzzer ON
      delay (300) ;// Delay 10ms
      digitalWrite (buzzer, HIGH) ;// turn buzzer OFF
      delay (75) ;// delay 10ms
    }
      for (i = 0; i <15; i++)
      {
      digitalWrite(13, LOW); // GPIO13 Closes Relay
      digitalWrite (buzzer, LOW) ; // Turn buzzer ON
      delay (75) ;// Delay 10ms
      digitalWrite(13, HIGH);
      digitalWrite (buzzer, HIGH) ;// turn buzzer OFF
      delay (150) ;// delay 10ms
      }
      delay(1500);
      digitalWrite(13, LOW); //Close Relay
      delay(750);
      digitalWrite(13, HIGH);
      }
}

BLYNK_WRITE(V8)  //For testing Lights * Buzzer without Opening/Closing Garage Door
{
  if (param.asInt() == 0)
  {
   digitalWrite(buzzer, HIGH); //GPIO13
  }
  else
  {
  //Beep Buzzer
  unsigned char i, j ;// define variables
      for (i = 0; i <12; i++)
      {
      digitalWrite (buzzer, LOW) ; // Turn buzzer ON
      delay (300) ;// Delay 10ms
      digitalWrite (buzzer, HIGH) ;// turn buzzer OFF
      delay (75) ;// delay 10ms
    }
      for (i = 0; i <15; i++)
      {
      digitalWrite(13, LOW); // GPIO13 Closes Relay
      digitalWrite (buzzer, LOW) ; // Turn buzzer ON
      delay (75) ;// Delay 10ms
      digitalWrite(13, HIGH);
      digitalWrite (buzzer, HIGH) ;// turn buzzer OFF
      delay (150) ;// delay 10ms

    }

  delay(2000);
  }
}

/* BLYNK_WRITE(V9) //Button Widget is writing to pin V1
 {
  int pinData = param.asInt();
  if(pinData==1)
  {
    lcd.clear();
    lcd.print(0 ,0,"Wifi Strength");                  // This fn displays the Wifi strength when a button is pressed from the Blynk App
    lcd.print(0 ,1,rssi);
  }else
  {
    lcd.clear();
  }
  delay(500);
  if(pinData==1)
  {
    lcd.clear();
    lcd.print(0 ,0,"IP ADDRESS:");                 // This fn displays the IP Address when a button is pressed from the Blynk App
    lcd.print(0 ,1,ip);

  }else
  {
    lcd.clear();
  }
  delay(500);
 }
 }
*/


// ==============( Void Loop  ) ====================================

void loop()
{
  Blynk.run();
  rssi=WiFi.RSSI();                                        // Functions to display RSSI and Ip address
  Serial.print(rssi);
 // lcd.print(0, 0, "Small Garage:)");
  String MyIp;
  MyIp =  "IP: " + String(WiFi.localIP()[0]) + "." + String(WiFi.localIP()[1]) + "." + String(WiFi.localIP()[2]) + "." + String(WiFi.localIP()[3]);
  String MyWiFi;
  MyWiFi = "WiFi: " + String(WiFi.RSSI());
  // lcd.clear();
    lcd.print(0 ,0, MyWiFi);                  // This fn displays the Wifi strength when a button is pressed from the Blynk App
    lcd.print(0 ,1, MyIp);
//    delay(1000);


  yield();
}
[ratings]
Reminder, some links in the post might be affiliate links, so I’ll make some coffee/beer/gadget money if you buy anything. You get it at the normal price, though!